BNM for Eclipse
Import a module tree
The BNM Eclipse integration is designed to work with the full module tree. So the first step is the import of the module tree as an BNM project:
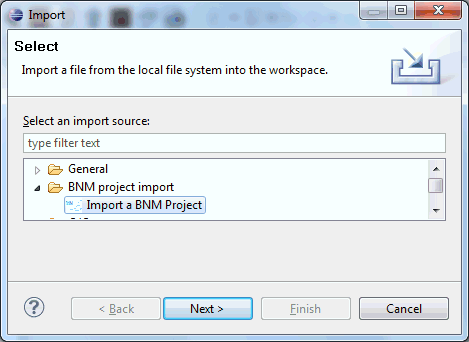
Select the root pom.xml of the module tree

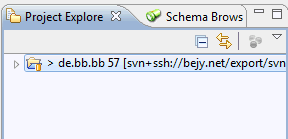
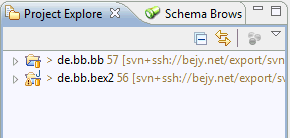
and select finish. Now your module tree shows up in the eclipse project view.
Create project for module
The next logical step is to create projects for the modules you want to work with.
Open the the BNM project and search the corresponding pom.xml then select BNM->import as project:
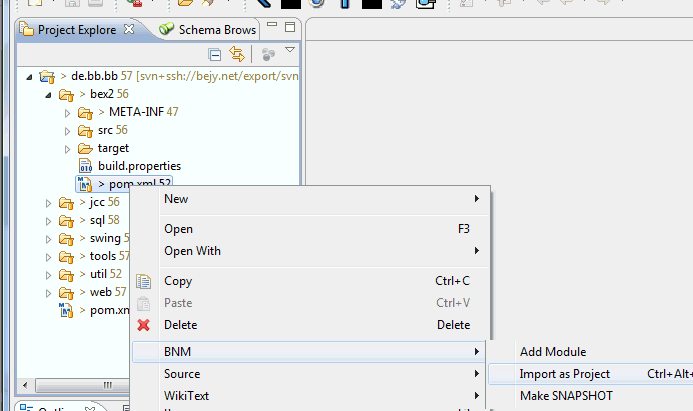
The preconfigured short cut to create a Java project for a module is
If you don't need the module project anymore, simple delete it, but DO NOT DELETE THE REAL CONTENT!
Work on a module
ALWAYS WORK WITH SNAPSHOT!!
To work on a module you need a SNAPSHOT version. If the module is not yet a SNAPSHOT version, simply select its pom.xml and chose "make SNAPSHOT" in the BNM context menu.
The action will promote all modules to SNAPSHOT where needed and opens the version dialog:
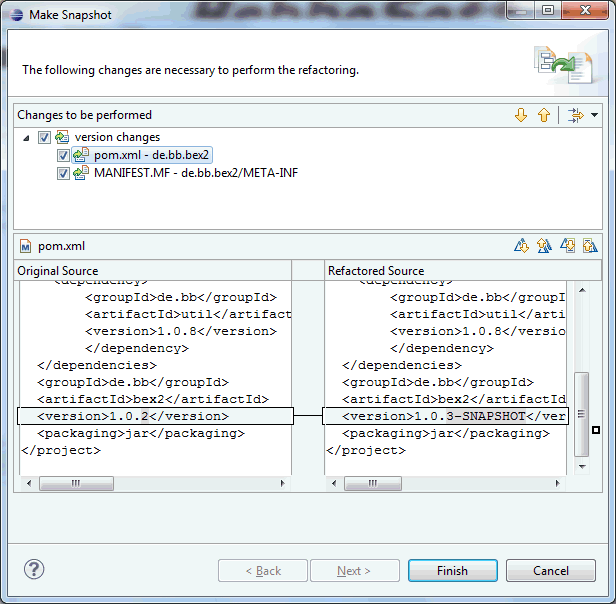
That dialog gives you a preview of all modified files.
Release versions
Similary to the "make SNAPSHOT" action you can promote all SNAPSHOTs into release state. All SNAPSHOT versions are changed into the release versions. The dialog gives you again a preview of all modified files.

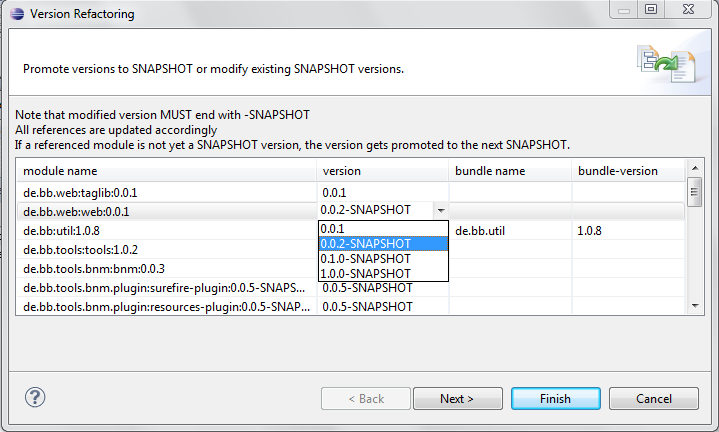
Promote versions
This dialog allows you to modify all versions in one step.
rev: 1.6